


[ad_1]
This post wouldn’t be possible without the support of a handful of amazing brands, who partnered with us. Thanks to KitchenAid, Caesarstone, Kokeena, and Rejuvenation for helping this kitchen come to life.
Two weeks ago I revealed my kitchen reno, and showed y’all the perfectly styled photos. Today I’m going to be sharing a bit more about how the kitchen functions, along with photos that show how the kitchen looks on a more normal day.
As always, I think we need to start with a floorplan review…

When we bought the house in 2018, the only way to get into the primary bedroom was through the kitchen. There was a small laundry-type room between the kitchen and the primary bedroom, where the previous owners had likely kept their washer and dryer, and also housed the entries into both the primary bedroom and primary bath. When we began renovating the house, we decided to close that space off from the kitchen (turning that small space into our walk-in closet), and create an entry into the primary bedroom through the adjacent bedroom (which we turned into our TV room). It’s not ideal to have a whole section of wall you can’t use for anything, in an already small kitchen, because it’s a door.
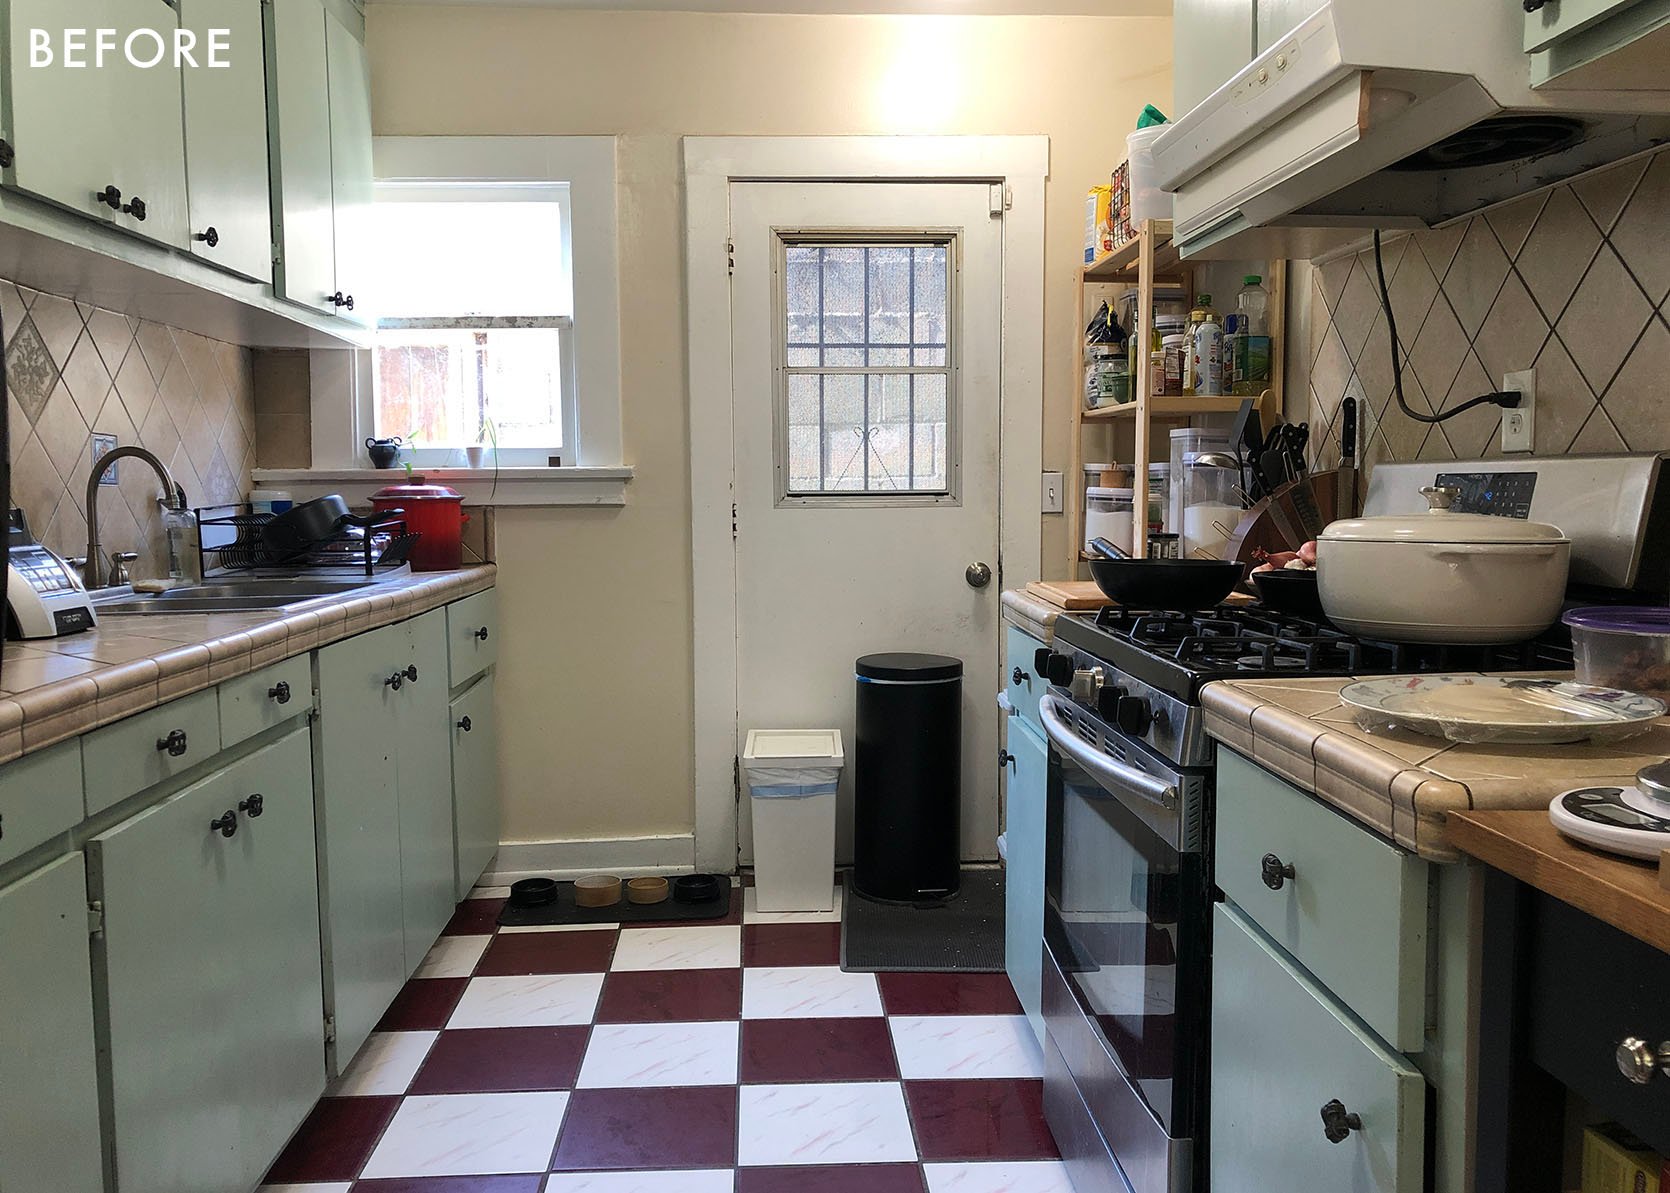
We also used to have a door to our side yard at the back of the kitchen, and an off-center window that the cabinets protruded into. We decided to close both of these as well, and instead install a single window in the center of the wall.
I wrote so many more more posts about this kitchen than even I remembered. You can see how I went from a $3000 kitchen makeover, to a full-blown renovation, to a functional-but-unfinished space, to the final reveal. You can even check out my unused budget designs. But the post I’d like to direct your attention to right now is this cabinet layout post, where I went through the entire process of deciding how we were going to install our cabinets and plan the use of the space. It’s a meaty post, and included these kitchen renderings Julie helped me with (and by help I mean, did for me out of the unknown depths of her heart):


I had completely forgotten about these! And I have to say, I think the finished product is pretty spot on.
Alright, let’s get FUNCTIONAL.


Faucet | Soap Dispenser | Sink | Arched Cutting Board | Brass Rail System | Sconce | Runner Rug | Flushmount | Window Valance | Curtain Rod | Brass Outlet Cover | Rubber Mat
On the left, we’ve got the “picture day” version of my kitchen, and on the right the “everyday” version. I’m sure there were some of you who were expecting them to look WAY DIFFERENT from each other, but the truth is I really tried to keep the kitchen styling for the reveal as close to realistic as I could stand. When it comes to shoots, we usually tear a place apart to create one shot, and then have to put it all back together. I tried really hard not to do that for this shoot (and for my sanity). I wanted to style it using 99% of items I already had or knew I would keep after the shoot.
So let’s spot the differences – Normally, we keep our electric kettle out on the counter and use it throughout the day for coffee and tea day. We got a really pretty, fancy pour-over kettle as a wedding gift (which we asked for on our registry), but realized that while it was beautiful, it just poured water too… slowly? Apparently, you want that when you do a pour-over. And so, we went back to this kettle my mom got for me from Costco. Old faithful. Also, we feed our cats in the kitchen, right under the window. Their bowls are pretty (ceramics that I made), but they’re messy little monsters so we keep a simple rubber mat under their bowls at all times. The cabinets above the fridge are where we store less-used kitchen appliances (air fryer, crockpot, juicer, etc.).


KitchenAid Stand Mixer | Ninja Professional Blender | Brass Bookends | Seagrass Woven Hanging Baskets | Rattan Hanging Baskets | Black Garlic Keeper
Our KitchenAid stand mixer is one of my all-time favorite kitchen appliances, and has a permanent home on the counter. But on a normal day, so does our blender, because I make smoothies just about every day. I also have a slightly more extensive cookbook collection, which was culled for aesthetic purposes on reveal shoot day. And I’ll admit, that basil was still alive for the everyday shoot, but it’s since been all used up.

While we’re only two people, I effectively make enough dishes in a day for a family of four. I make 2-3 meals a day in the kitchen, and I’m not conservative with getting pots, pans, plates, etc. dirty. We go through spoons the fastest. So oftentimes our KitchenAid 44dBA Dishwasher with Panel-Ready Design (wonderfully bestowed upon us by KitchenAid) is working hard. Not having a sink piled with dishes is such a game-changer for my clutter-body, especially when I don’t have the time or energy to cook and then clean. Because I work at the dining table with a perfect view of the sink, it makes my skin itchy to try and focus when the sink and counter are cluttered. You can find additional game-changers by exploring KitchenAid(R) Suite Collections here.

Here’s a quick peek into our “junk” drawer – which is actually fairly organized, no thanks to me. Macauley runs this drawer and is constantly upkeeping it. We’ve got common household repair items (screwdriver, caulk, level, measuring tape, box cutter, etc.), batteries, and first aid. We’ve been taking the drawer organizing game pretty seriously in our house, and you can find us at The Container Store or Target on a Sunday laying out drawer inserts into a measured square on the floor figuring out what layout would work the best. Apparently, there are people you can hire to do this for you if you’re super serious about it, but we prefer to drive ourselves slowly insane instead.


Brass Switchplate | Rattan Tray | Honey Jar | French Press | Countertop
Here’s a closer look at our everyday coffee corner. We’ve usually got the french press out next to the kettle or drying in the sink. And I hang another dishtowel on this side of the sink for easy grabbing. Our counters (from Caesarstone) really shine here, because they’re super easy to clean up, and this area does get a lot of action. They’ve also proven super durable so far.
Having the hanging towel on an eye-level hook next to the sink is a super small change that has really made a difference in my paper towel consumption. My brain doesn’t have to do the mental gymnastics of trying to locate a nearby dish towel and instead just reaching for a paper towel. We keep our paper towels up on the top shelf, where we can reach them in case of cat vomit situations, but otherwise keep them pretty out-of-sight-out-of-mind.
Under the coffee corner is where our pull-out trash cans are, with a little drawer on top to store our aluminum foil, parchment paper, etc. This double drawer and trashcan setup is an amazing way to sneak just a little bit more storage into the space.

Cabinet Fronts | Brass Hardware | 12 Cup Food Storage Container | 2.7qt Food Storage Container | 4.3qt Food Storage Container
Heading over to the other side of the kitchen, let’s see what’s behind each of these beautiful cabinet doors (from Kokeena’s Townsend collection).
At the tippy-top of the tall cabinet is where I store my pantry overflow (bags of flour that had too much flour to fully decant, or items that I use less frequently like coconut flour). Next shelf down is snack foods – cereal, ramen, cookies…
The top shelf of the lower cabinet contains vitamins/coffee/tea/supplements (in a lazy susan type spinner that keeps it all contained), next is the microwave, then a thin drawer for more specialized cooking utensils we don’t reach for as often (meat thermometer, mandolin, etc.), a deeper drawer for mixing bowls and large measuring cups, and then a super deep bottom drawer where we keep all the cat supplies. Having the cat food tucked away in a pull-out drawer right next to the cat food bowls makes for a pretty easy feeding routine.
Next up, our “everyday” pantry items mostly live in the wall-hung cabinet to the left of the oven. We’ll take a closer look at that further down. Moving onto the lower drawers – first is spices, next is baking supplies (pans, racks, etc.), and lastly – my favorite drawer – our dry goods pantry, where I store different kinds of flours, sugars, and the like.
Because our kitchen is a galley shape, we didn’t have space for a walk-in pantry, so I had to get creative with the storage. I reach for pantry items a lot, so I wanted them in easy-to-access spaces. OXO’s biggest containers just happen to perfectly fit into Ikea’s deepest drawers – a match made in kitchen organization heaven.


Black Top 16oz Food Storage Container | Rice Cooker | In-Drawer Spice Rack | White Lid Food Storage Container | Large Expand-A-Shelf | Turn Table (similar)
Here’s how our upper cabinets are organized. We’ve got a lazy susan in there for all the oils and vinegars, some leveled risers from The Container Store to make space for canned goods and the like, and some bigger containers for everyday grains and starches.
Our spice drawer makes it super easy to access any type of spice or bullion we’d need during cooking, and the lay-flat design makes it easy to identify each bottle. And as promised, here’s where our Zojirushi lives. We pull it forward when we use it, so the steam doesn’t get trapped under the cabinet, but it stays there full time.


Left – perfectly styled. Right – slightly more chaotic. We always have this large cutting board out on the counter (linking to our new Boos cutting board that we’ve replaced the cutting boards in the photo with since the shoot!), because it’s where I butter toast, chop veggies, prep sandwiches, all of it every day. Right next to our knife block, and a crock filled with a lot more cooking utensils than seen on reveal day.
The floating cabinet on this side houses all our cups, plates (most of our bigger serving ware lives out in the bar cabinet you can see in the dining room). Top drawer is additional cooking utensils and flatware, the middle drawer is cooking pans, and the bottom drawer is stock pots and dutch ovens. And the tall cabinet on the right side is where we keep all our cleaning supplies (you can’t see them but our broom and Swiffer live on the inner left wall). The cleaning supplies rack pulls out of the cabinet, making it super easy to access all of the supplies.
So that’s it – that’s what our kitchen looks like on a normal day versus a styled day. I tried my best to create a space that not only looks nice, but I’m actually able to keep looking clean and organized because the storage is super functional. So far, it’s been working really well, and the streamlining of working in the kitchen is great. I don’t know if we have the “golden” triangle ratio that everyone raves about for kitchens, but having the range and sink directly across from one another is *chefs kiss*, we’ve got plenty of counter space due to the brass rails (from Rejuvenation) and the floating shelf, and almost all of our pantry, dishware, and appliances are stored behind our pretty cabinetry. Admittedly we’re only two people and don’t have kids, so we may have less “stuff” than a larger family.
But this is what works for our family right now, and I’m pretty proud of how functional it is.
*Design and Photos by Sara Ligorria-Tramp
**Styled by Emily Bowser
[ad_2]
Source link
More Stories
The Importance of Foam Insulation in Commercial Construction
Home Improvement Design Elements
Specialty Commercial Door Hinges and Key Storage Cabinets